

Embedding a venue tour on your event website means placing an interactive virtual tour, ticketing widget, or event calendar directly into your site's HTML using an iframe, a standard HTML element that loads an external page inside your own. The result: visitors explore your space, check dates, and buy tickets without ever leaving your site. Here is what you can embed and what each element does for your event promotion:
- Interactive 360° virtual tours let planners walk through your venue remotely, reducing the need for in-person site visits
- Ticketing widgets from platforms like ThunderTix put a live purchase flow directly on your event page
- Event calendars and registration forms from tools like Blackthorn Events show live schedules and accept RSVPs inline
- Single-event and recurring-event embed codes target specific dates or tour stops for clarity
- Responsive, mobile-friendly iframes keep all of these elements accessible on any screen size
Each of these elements works through the same core mechanic: a short snippet of HTML you paste into your site. Simple Virtual Tour, used by over 1,400 venues, generates ready-to-use embed codes for cloud-hosted and self-hosted tours alike.
How do you embed event and ticket codes on your venue website?
Ticketing platforms generate embed codes tied to specific events, so the first step is always logging into your platform and locating the embed or widget section for the event you want to promote.

Embedding with ThunderTix
ThunderTix provides embed widgets for individual tour stops, where dates and times apply specifically to that event, keeping the purchase flow clear for visitors.
- Log into your ThunderTix account and open the event you want to sell tickets for.
- Navigate to the Embed or Widget tab within that event's settings.
- Copy the iframe snippet ThunderTix generates.
- Customize the width and height values in the snippet to match your page layout.
- Paste the code into your website's HTML editor at the location where you want the widget to appear.
Embedding with Blackthorn Events
Blackthorn Events supports both iframe snippets and shortcodes, giving you options depending on whether your site runs on a CMS or plain HTML.
- Open your Blackthorn Events dashboard and select the event or calendar you want to embed.
- Choose between a monthly calendar view or a standalone event landing page embed.
- Copy the generated iframe or shortcode.
- Paste it into your HTML editor or CMS widget area.
Pro Tip: Test your ticketing embed on a staging page before publishing. A broken widget on your live event page can cost you real ticket sales.
For recurring events, most platforms let you generate a single embed code that automatically updates as new dates are added, so you do not need to re-embed every time your schedule changes.
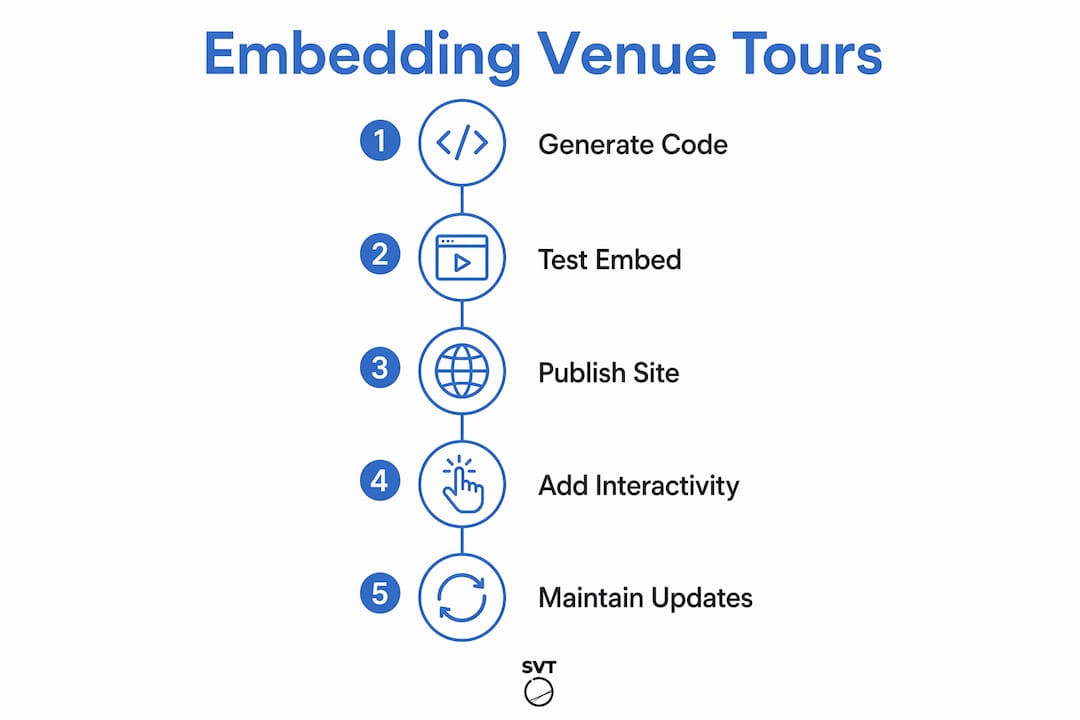
How do you embed an interactive virtual tour on your venue website?
A virtual venue tour embedded via iframe gives planners a full walkthrough experience without scheduling a site visit. Platforms generate a simple iframe snippet, typically two lines of HTML, that you paste wherever you want the tour to appear.
Step-by-step iframe embedding
- In your tour platform (such as Simple Virtual Tour), open the tour you want to share and locate the Embed section.
- Copy the tour embed link, which strips the logo and border so the tour integrates cleanly into your page design.
- Build your iframe using this structure:
<iframe src="YOUR_TOUR_LINK" width="100%" height="600" title="Venue Virtual Tour"></iframe> - Set
width="100%"so the tour scales with the page. Adjust height in pixels to suit your layout. - For a specific room or space, use the scene embed link instead of the full tour link. This loads only that room, useful for highlighting a ballroom or breakout space.
- Paste the completed iframe code into your page's HTML at the point where you want the tour to display.
Making tours interactive with hotspots and viewing modes
A single panorama shows one room. A multi-scene tour shows the whole venue. Widgets that support up to 10 scenes per tour and five hotspots per scene let you label capacity, staging areas, and catering zones so planners get the details they need without asking.
Professional venue tours typically offer three viewing modes, all of which you can make available in your embedded tour:
- Walkthrough view: first-person navigation through the space, as if the visitor is on-site
- Directory view: quick jumps between rooms and levels, useful for large multi-room venues
- Dollhouse view: a 3D overhead layout showing how spaces connect and how guests flow through the venue
ICC Sydney uses all three modes to help planners understand scale and flow before committing to a site visit. Adding hotspots with capacity figures, access point details, or direct booking links turns a passive tour into a working sales tool. For a deeper look at advanced hotspot features, Simple Virtual Tour's documentation covers interactive maps and booking integrations in detail.
How do you embed event calendars and registration forms?
Embedding a live calendar or registration form keeps your event schedule current without manual page updates. Blackthorn Events, for example, lets you embed monthly calendar views and standalone event pages using iframes or shortcodes, both of which pull live data from your event management account.
- In your event management platform, open the Calendar or Forms section.
- Select the view you want to embed: a full monthly calendar or a single-event registration form.
- Copy the iframe or shortcode provided.
- Customize the embed dimensions to fit your page column width.
- Paste the code into your site's HTML editor or CMS widget area.
- Publish the page and confirm that the calendar or form loads with live data.
Registration forms work the same way. You embed the form as an iframe or a JavaScript widget, and submissions go directly into your event management platform. Visitors RSVP or register without being redirected to an external page, which keeps the experience consistent with your brand. Pairing a live calendar with e-commerce integration inside your virtual tour creates a single destination where planners can explore, check availability, and book in one session.
How do you add embed codes into WordPress and other website builders?

WordPress, Wix, and Squarespace all support iframe embeds, though the exact steps differ slightly by platform.
WordPress
- Open the page or post where you want the embed to appear.
- Click the + button to add a new block and search for Custom HTML.
- Paste your iframe code into the Custom HTML block.
- Preview the page to confirm sizing and alignment.
- Publish or update the page.
Wix
- In the Wix Editor, click Add and select Embed from the menu.
- Choose Embed a Widget and paste your iframe code into the field provided.
- Resize the embed element on the canvas to match your layout.
Squarespace and GoDaddy
Both platforms offer a Code Block or HTML Block element. Add one to your page, paste your iframe snippet, and save. WordPress uses a Custom HTML block; Wix uses an Embed a Widget element, but the underlying iframe code is identical across all of them.
Security note: Only embed widgets from platforms that serve content over HTTPS. Cross-origin policies and secure HTTPS embedding protect your visitors' data and prevent your site from flagging browser security warnings. If a ticketing or tour platform only offers an HTTP embed link, contact their support before placing it on a live page.
What are the best practices for embedding venue tours and event widgets?
Getting the embed code onto the page is only half the job. How you configure and maintain it determines whether visitors actually engage with it.
- Use percentage-based widths, not fixed pixels. Setting
width="100%"on your iframe lets it scale to any screen. Fixed pixel widths break on mobile; a 900px-wide iframe on a 375px phone screen forces horizontal scrolling and most visitors leave. - Add ARIA labels and title attributes to every iframe for screen reader compatibility.
title="Venue Virtual Tour"is the minimum; it tells assistive technology what the frame contains. - Enable keyboard navigation in your tour platform settings where available, so visitors who do not use a mouse can still move through the space.
- Integrate analytics tracking by attaching event listeners to your iframes or using your tour platform's built-in API. Tracking clicks, view duration, and hotspot interactions tells you which spaces generate the most interest and which pages convert visitors into inquiries.
- Minimize loading impact by lazy-loading iframes. Adding
loading="lazy"to your iframe tag defers the tour or widget from loading until the visitor scrolls to it, which keeps your page's initial load time fast. - Audit third-party permissions regularly. Ticketing and tour widgets loaded from external domains can introduce vulnerabilities if those platforms update their code. Review embedded scripts quarterly and confirm that your Content Security Policy allows only trusted domains.
Pro Tip: Simple Virtual Tour's cloud-hosted option means your embed link always points to the latest version of your tour. You update the tour once in the platform, and every page where it is embedded reflects the change instantly, with no re-embedding required.
For venues exploring AI-assisted booking and visitor engagement alongside their embedded tours, AI tools for event venues offer integrations that complement interactive tour experiences.
Key Takeaways
Embedding interactive venue tours and event widgets on your website converts passive visitors into active prospects by letting them explore, check availability, and book without leaving your site.
| Point | Details |
|---|---|
| Iframe is the core technology | A two-line HTML iframe snippet embeds virtual tours, ticketing widgets, and calendars on any website. |
| Use percentage widths for mobile | Setting width="100%" on iframes prevents display breakage on mobile screens. |
| Hotspots turn tours into sales tools | Up to 10 scenes and 5 hotspots per scene let you label capacity, staging, and booking links inside the tour. |
| CMS embedding follows the same logic | WordPress, Wix, and Squarespace all accept iframe code via a Custom HTML or Embed Widget block. |
| Simple Virtual Tour updates automatically | Cloud-hosted tours update across all embedded locations the moment you publish a change in the platform. |