
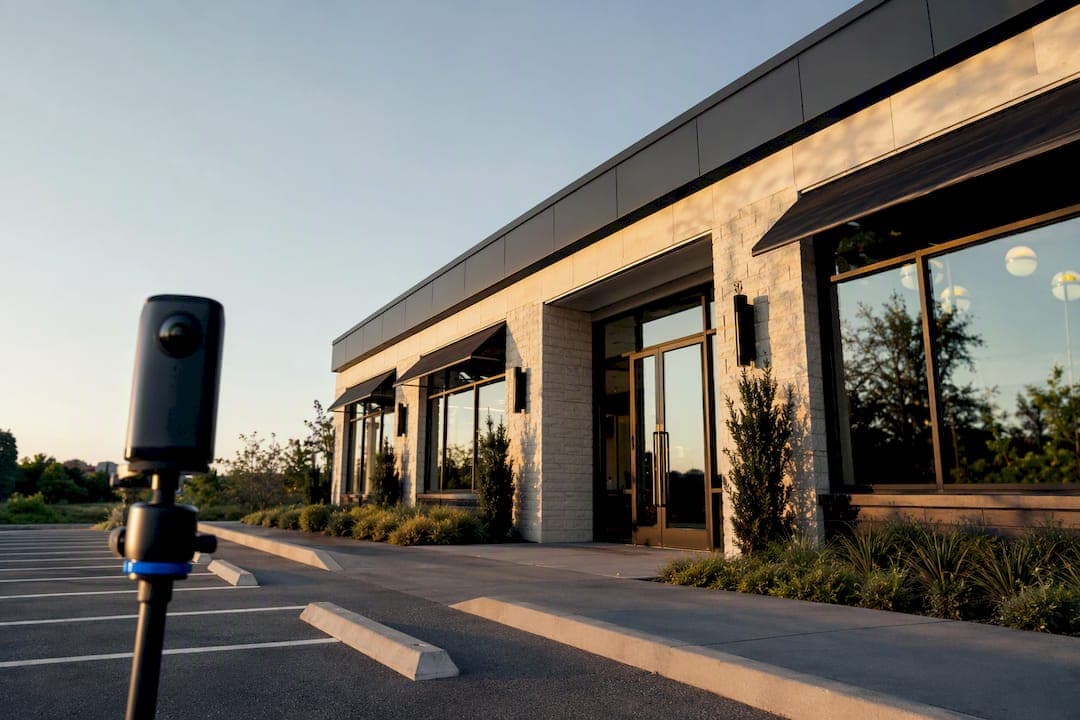
Most people should upload their 360 videos or photos through Street View Studio, Google's free browser tool for publishing directly to Maps. Developers building bulk or automated workflows should use the Street View Publish API instead. Either route, expect several days of processing before your imagery goes live, and treat indoor spaces differently since GPS rarely works indoors. If you want branding, embedding, or analytics on top of map visibility, pair your Street View listing with a hosted tour, such as Simple Virtual Tour.
TL;DR:
- Using Street View Studio for uploads requires processing several days before imagery appears live, especially for connected photo sequences.
- The API is best suited for managing large-scale uploads, metadata accuracy, and programmatic control, but access to some features may require Google's invitation.
- Prior to shooting, ensure videos meet 4K resolution, proper file formats, GPS embedding, and avoid stabilization to optimize upload quality and reduce reprocessing.
- Content removal usually results from policy violations or low quality, with policy issues being appealable and quality issues requiring re-shooting.
- Pairing Street View with a branded virtual tour enhances engagement and conversions, as Street View alone lacks features like analytics, branding, and direct call-to-action capabilities.
Table of Contents
- How Do You Publish to Street View Studio Step by Step?
- When Should You Use the Street View Publish API Instead?
- What Camera and File Requirements Should You Check Before You Shoot?
- What Happens After You Publish, and How Do You Handle a Removal?
- When Is Street View Enough, and When Do You Need a Real Tour?
- Why Pairing Street View With Your Own Tour Changes the Outcome
- Where Simple Virtual Tour Fits Once You've Published to Street View
- What Most Guides Get Wrong About Street View Publishing
- Sources
How Do You Publish to Street View Studio Step by Step?
Street View Studio is Google's own upload console, and for anyone without a development background, it is the fastest path from camera footage to a live Street View listing. You sign in with a Google account, open Studio, and the process runs in a predictable sequence.
- Open Street View Studio and select Upload.
- Choose your file. Supported formats are .mp4 and .mov for 360 video.
- If your camera did not embed GPS data, upload a matching .gpx file alongside the video. Most modern 360 cameras record GPS directly into the video metadata, so this step is often unnecessary.
- Preview the upload, confirm the details, and let the progress bar run.
- If the upload stalls or fails partway through, reselect the same file to resume rather than starting over.
Once the file finishes uploading, processing on Google's end can take several days, and connections between individual photos in a sequence often don't appear until several days after publishing. Use Studio's filters to check whether a capture is still processing or already live and to confirm the recorded capture date matches what you expected.
A few problems come up often enough to flag in advance:
- Missing or inaccurate GPS: upload a GPX file exported from your camera app or a separate GPS logger.
- Processing failures: check that your video resolution and format meet Street View's specifications before re-uploading.
- Interrupted uploads: reselect the original file rather than trying to append or restart from a different one.
Pro Tip: Shoot a short test clip and publish it before you commit to capturing an entire property or trail. A five-minute test run tells you whether your camera's GPS metadata is reliable, which saves you from redoing hours of footage later.
When Should You Use the Street View Publish API Instead?
Street View Studio works fine for one-off uploads, but it breaks down fast once you're managing dozens or hundreds of locations. That's what the Street View Publish API exists for: a set of programmatic tools that let a developer publish and manage 360 photos and their metadata without touching a browser interface.
The API centers on a handful of core operations:
- StartUpload and StartPhotoSequenceUpload to initiate an upload session.
- CreatePhoto and CreatePhotoSequence to publish the actual imagery once uploaded.
- UpdatePhoto to correct pose, placement, or connectivity after the fact.
- Delete operations to pull content down programmatically.
This matters most for three use cases: bulk uploads across many sites at once, programmatic placement where you're calculating pose and position algorithmically, and integrations that sync a back end system (a property management platform, a franchise's internal CMS) directly with Street View. Each published photo needs metadata covering capture time, camera make and model, telemetry timestamps, and pose and place association, and the API reference documents exactly how those fields get structured.
One caveat worth planning around: video and sequence support for some API methods has historically required Google's invitation or approval before you get access. If your workflow depends on converting video into a photo sequence at scale, budget time for that evaluation step rather than assuming instant access.
Pro Tip: Verify pose and metadata on each photo individually before calling CreatePhoto. Catching a bad GPS reading or a mismatched timestamp before publishing is far less painful than fixing it after Google has already processed the upload.
What Camera and File Requirements Should You Check Before You Shoot?
Getting flagged for reprocessing or quality removal almost always traces back to something skipped during capture, not the upload itself. Run through this checklist before you even leave for the shoot.
- File format: video uploads need to be .mp4 or .mov; single 360 images typically upload as standard equirectangular JPEG files.
- Resolution and field of view: Google's Street View ready specifications call for 4K class resolution and a full 360 degree horizontal field of view, with stitching handled on the device rather than left for Google to fix later.
- Stabilization: turn off motion stabilization on your camera before recording for Street View. Stabilization algorithms can distort the equirectangular projection Street View expects.
- GPS and telemetry: confirm your camera embeds GPS directly, or plan to upload a GPX file with timestamps that match your video frames exactly.
- Indoor captures: skip video-to-sequence conversion indoors. GPS signal degrades badly inside buildings, so manual single-photo capture with manual placement is the more reliable route.
The 4K-class benchmark isn't arbitrary. It's the resolution tier Google specifies for hardware and software to qualify as Street View ready, and footage shot well below it is a common reason uploads come back looking soft or blurry once processed.
What Happens After You Publish, and How Do You Handle a Removal?
Patience is part of the workflow here. Processing routinely takes several days, and if you've uploaded a sequence of connected photos, the links between them may not appear until four or more days after the initial publish. Don't assume something broke just because your tour looks disconnected on day one.
If content does get pulled, it falls into one of two categories:
- Policy violations (privacy issues, inappropriate content, prohibited locations) are appealable directly through Street View Studio, where removed frames show a marker you can click to start the appeal.
- Quality removals (blur, poor stitching, resolution below spec) are not appealable. Your only path forward is reshooting and re-uploading.
A few habits lower your odds of a removal in the first place:
- Blur faces and license plates before publishing, especially in populated areas.
- Avoid capturing private interiors where the property owner hasn't consented or where local policy restricts it.
- Review Google's user-contributed content guidelines for your capture type before you shoot, not after you've already uploaded.
When Is Street View Enough, and When Do You Need a Real Tour?
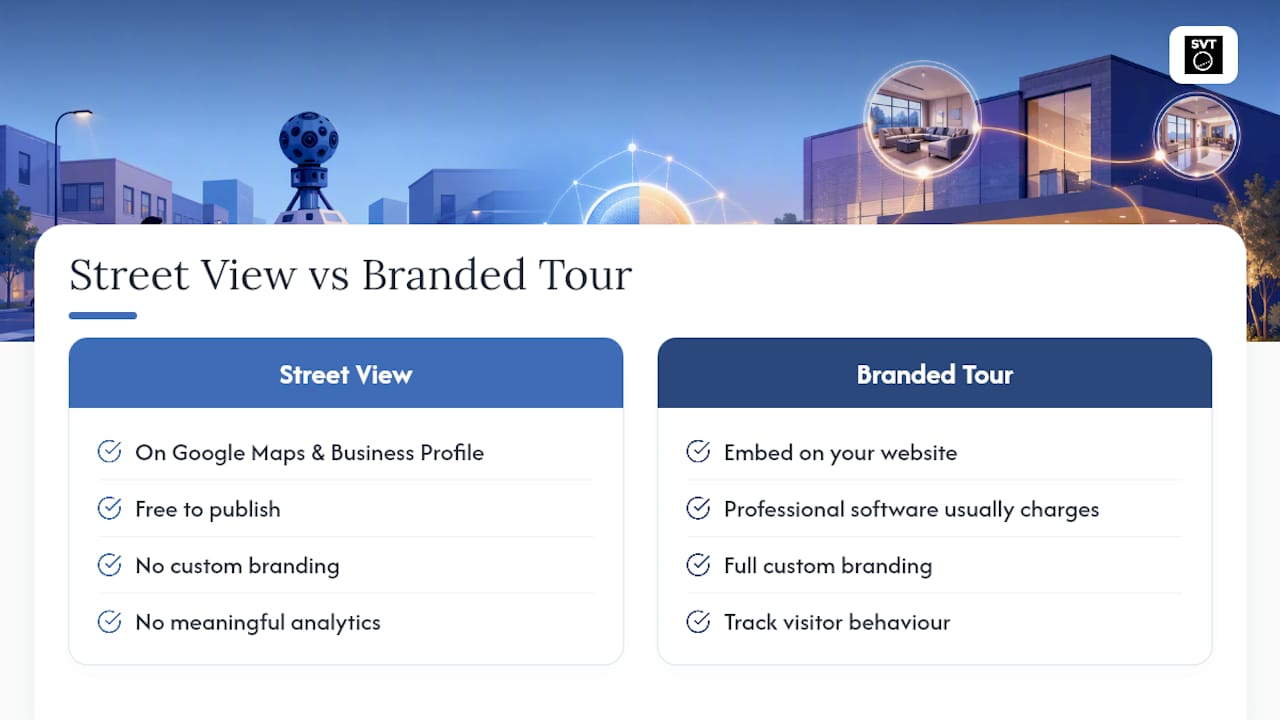
Street View earns its place in your marketing stack because it's free and it puts your location directly on Google Maps and your Business Profile, where people are already searching. That reach comes with real limits: no custom branding, no meaningful analytics, minimal calls to action, and a presentation that's entirely Google's, not yours. Publishing to Street View costs nothing, but professional virtual tour software usually charges for the features Street View simply doesn't offer.
The practical answer for most businesses is not choosing one over the other; using visual storytelling tips helps explain why hosting branded tours boosts engagement and conversion. Publish your baseline 360 imagery to Street View so people find you through Maps and Search, then embed a branded virtual tour on your own website where you actually control the experience and can track what visitors do once they arrive.
Why Pairing Street View With Your Own Tour Changes the Outcome
Street View gets you discovered. It does not get you a lead, a booking, or a sale, and that gap is where most businesses leave value on the table. A prospective buyer or guest who lands on your Street View listing through Google Maps has no way to click through to a contact form, no branded experience that reinforces who you are, and no data trail telling you which room or angle they lingered on.
A suitable virtual tour platform can fill that gap without asking you to abandon Street View. Such platforms often support unlimited interactive tours, live guided sessions, e-commerce integration, and offer both self-hosted and cloud deployment options so you can maintain control over your data if that matters to your business. It also includes a Google Street View publishing workflow of its own, meaning the same 360 assets you captured for Studio can feed a branded tour without a second shoot.
Choose a virtual tour solution when you want your own branding on the experience, the ability to embed the tour directly on your site, or analytics that tell you what visitors actually looked at. The workflow that works: capture per your checklist, publish to Street View Studio for map visibility, then build an embedded branded tour for the conversion side of the job.
Where Simple Virtual Tour Fits Once You've Published to Street View
If you've followed the steps above and your Street View listing is live, you've solved discovery. You haven't solved conversion, and that's a different problem with a different tool. Certain virtual tour platforms are built for exactly that gap: real estate agents, tourism operators, event planners, and retail owners who need more than a pin on a map.
Features that make such platforms worth considering after you've handled the Street View side include unlimited tours under one account, live session hosting for real-time client walkthroughs, e-commerce integration if selling directly from the tour, and options between cloud-hosted convenience or self-hosted control over your own data. Many offer an intuitive backend suitable even for photographers and small business owners without technical backgrounds, avoiding the need to hire a developer.
The same 360 photos or video you captured for Street View Studio can become the foundation of a branded, embeddable tour. Visit the Simple Virtual Tour purchase page to start a trial and see how the two channels work together, one for map discovery and one for turning that traffic into an actual inquiry.
What Most Guides Get Wrong About Street View Publishing
Most advice on this topic treats Street View publishing as a finish line. It isn't. It's a distribution channel, and treating it as the whole strategy is where businesses quietly leave results on the table.
Here's the part that gets skipped: Google isn't shutting Street View down, and the persistent rumors to that effect have made some business owners hesitant to invest time in publishing at all. That hesitation costs you free visibility for no real reason. Street View remains one of the simplest ways to get a physical location surfaced in Google Maps, and skipping it because of an unfounded shutdown rumor is a mistake worth correcting.
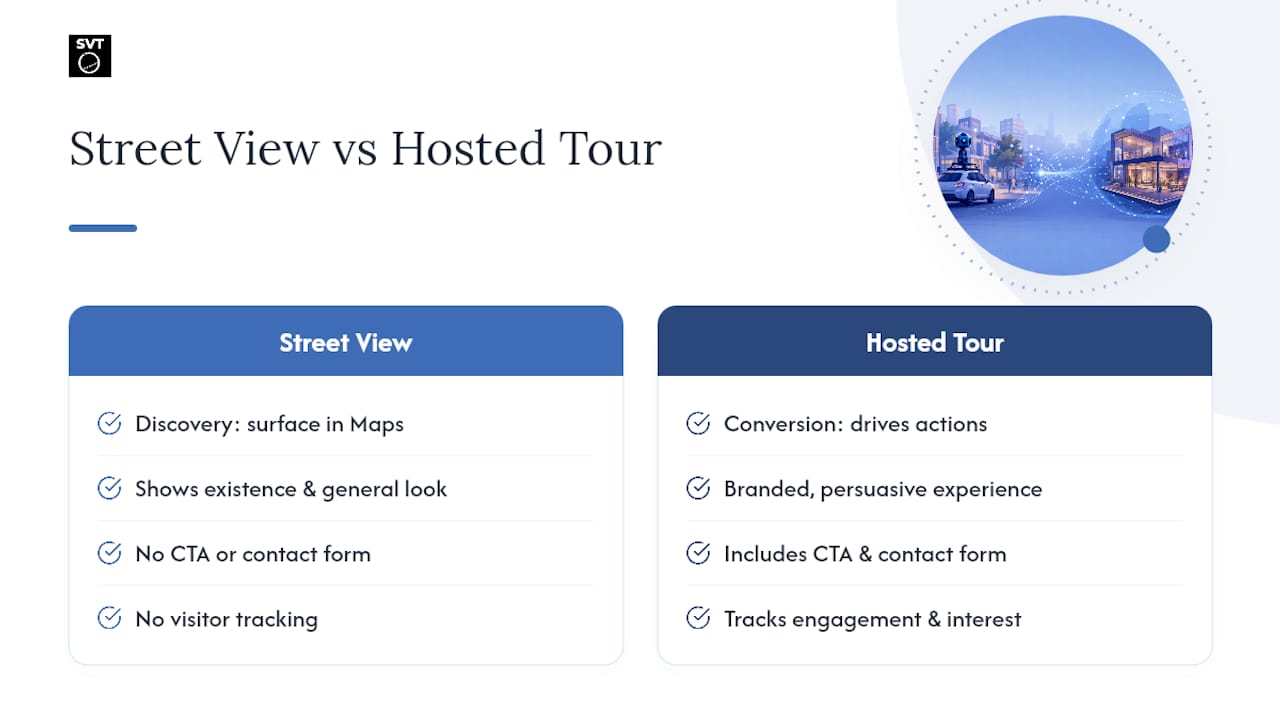
The bigger misunderstanding, though, is thinking a Street View listing does the same job as a proper virtual tour. It doesn't, and it was never designed to. Street View answers "does this place exist and what does it generally look like." A branded tour answers "should I visit, book, or buy," because it's the only one of the two with a call to action, a contact form, or a way to track what a visitor actually cared about. Businesses that publish to Street View and stop there are optimizing for the wrong metric. Foot traffic to a map pin isn't revenue. A visitor who lingers on your embedded tour, clicks a hotspot, and fills out a form is a lead you can actually follow up on.
The smart move isn't picking a side. It's sequencing them correctly, Street View for the discovery layer, a hosted tour for everything that happens after someone is curious enough to click.
— Andrea
Sources
- Upload 360 videos to Street View Studio & review content removals - Google Maps Help
- Street View ready specifications - Google for Developers