

Interactive map hotspots are the clickable markers inside a 360° tour that reveal information, media, contact options, or bookings the moment a viewer needs them. Placed well, they turn a passive walkthrough into an active decision tool, and strategic placement can lift engagement by up to 300 percent. Start by mapping decision-point hotspots and sizing everything for mobile before touching anything else.
TL;DR:
- Place the most important hotspot within the viewer's initial field of view to maximize the likelihood of a click during the first three seconds.
- Limit hotspot count to three to five per scene to prevent decision paralysis and prioritize the viewer's most pressing questions.
- Write concise, specific copy that explains unique scene details or prompts immediate action, avoiding repetitive or overly generic content.
- Compress media assets and size hotspots for mobile to ensure fast load times and accurate tapping on devices, especially smartphones.
- Use analytics to track hotspot performance regularly, and remove or improve low-performing hotspots to optimize engagement and conversions.
Table of Contents
- What Types of Interactive Map Hotspots Should You Build?
- Where Should You Place Hotspots for Maximum Visibility?
- How Do You Write Hotspot Content That Converts?
- What Technical Setup Keeps Hotspots Fast and Accessible?
- How Do You Measure and Improve Hotspot Performance?
- Who's Behind This Guidance and What Proves It Works?
- Why Most Hotspot Advice Undersells the Basics
- Build Hotspots That Actually Get Clicked
- Sources
What Types of Interactive Map Hotspots Should You Build?
Not every scene needs the same hotspot. The right type depends on what the viewer is actually deciding at that moment, and mixing too many types into one scene creates noise instead of clarity. Industry guidance groups hotspot behavior into a handful of core categories, each solving a different problem:
- Information hotspots surface facts the viewer can't see, like square footage, ceiling height, or a room's orientation.
- Media hotspots open photos, video clips, or audio, useful for showing a kitchen renovation timeline or a museum artifact's backstory.
- Contact and booking hotspots trigger a phone call, email form, or scheduling widget, right where the viewer is emotionally ready to act.
- Product or service hotspots link to a price sheet, floor plan, or e-commerce listing tied to what's on screen.
- Social proof hotspots display a review, rating, or testimonial near the feature it praises.
A real estate agent might pair an information hotspot on a kitchen island with a booking hotspot near the front door. A tourism marketer showcasing a historic site might lean on media hotspots to unlock archival footage, then close with a social proof hotspot from a student history tours expert bringing past to life. A venue marketer often blends product hotspots (catering packages) with contact hotspots (inquiry forms) in the same scene. The goal isn't variety for its own sake. It's matching hotspot type to the question the viewer is actually asking.
Where Should You Place Hotspots for Maximum Visibility?
Placement decides whether a hotspot gets clicked or ignored. The 3-second rule is the single most useful guideline here: whatever you want a viewer to notice first needs to sit inside their initial field of view when a scene loads, not buried behind a 180-degree turn they may never make.
Beyond that first glance, focus on decision points, the moments where a viewer is genuinely weighing an option. A bathroom scene's decision point might be "is this tub big enough?" A hotel room's might be "does this view justify the price?" Put your hotspot exactly there.
Here's a practical sequence for authoring any scene:
- Identify the single most valuable fact or action for this scene and place it in the 3-second zone.
- Add two to four supporting hotspots, since 3 to 5 hotspots per scene is the sweet spot that avoids decision paralysis while still answering common questions.
- Order hotspots by likely viewer priority, not by how the scene happens to be composed.
- Reserve action-oriented hotspots (book, call, buy) for after informational context has been delivered, a pattern known as progressive disclosure.
- Size every hotspot for a thumb, not a mouse cursor, and test the tour on an actual phone before publishing.
- Keep iconography consistent scene to scene so a booking icon always looks like a booking icon.
Pro Tip: Add a subtle pulse or glow animation to your highest-priority hotspot for the first two to three seconds after a scene loads, then let it settle into a static icon. That brief motion draws the eye without permanently distracting from the panorama itself.
How Do You Write Hotspot Content That Converts?
Hotspot panels fail for one of two reasons: the copy says too much, or it says nothing new. Best practice holds that a hotspot should explain something the viewer can't already see in the scene. If your hotspot text just restates what's visible in the panorama, cut it.
Keep the panel copy scannable. One or two short sentences and a specific call to action outperform a paragraph every time. "Schedule a showing" beats "Contact us for more information." "Watch the chef's tasting menu" beats "Learn more." Specificity tells the viewer exactly what happens next.
A few rules worth following on every panel:
- Cap body text at roughly 20 to 30 words; anything longer belongs in a linked page, not the popup.
- Use short video clips (under 30 seconds) rather than long-form video that stalls the tour experience.
- Compress images before uploading, and add captions for any embedded video.
- Keep icon style, color contrast, and font choice consistent across every scene so the tour feels like one product, not a patchwork.
- Match hotspot copy to buyer questions, since content aligned to what viewers are already wondering about dimensions, pricing, or availability tends to earn more clicks than generic labels.
What Technical Setup Keeps Hotspots Fast and Accessible?
A hotspot that loads slowly or fails on mobile costs you the click regardless of how well it's written. Compress every image and video asset before upload, and lazy-load media so the panorama itself renders instantly while hotspot content streams in behind it. Preload only the one or two hotspots most likely to be opened first.
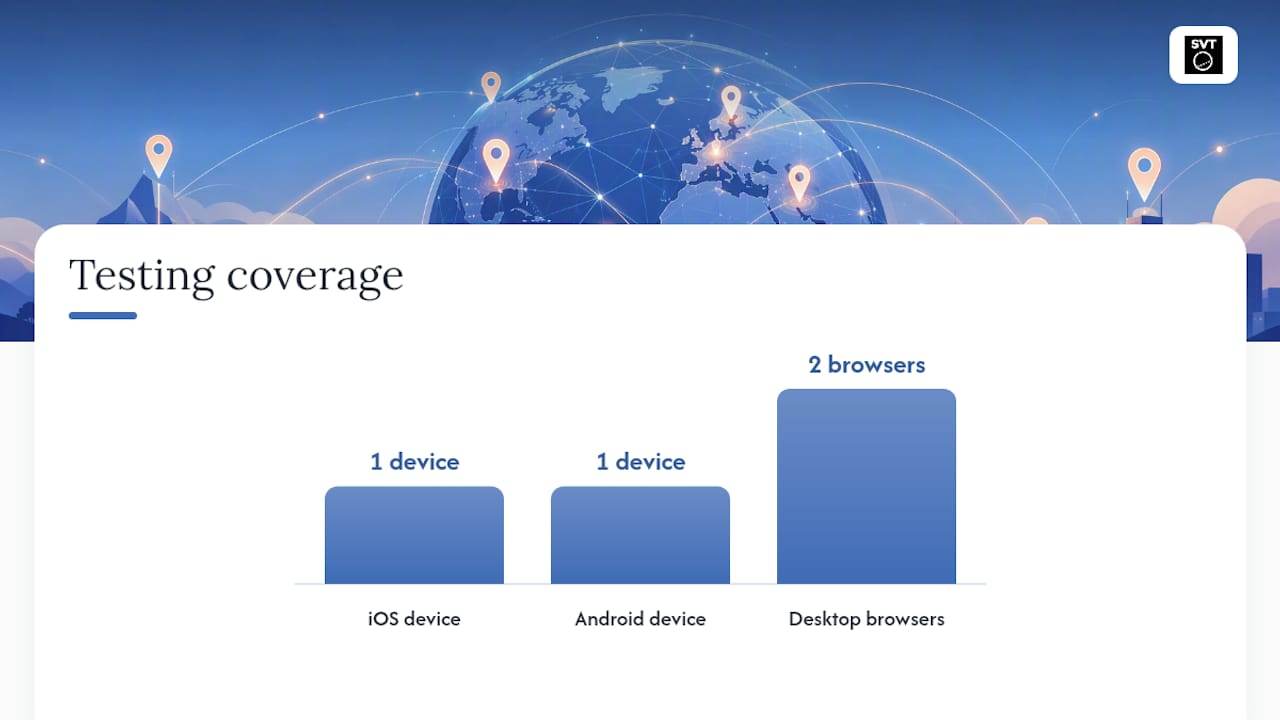
Given that mobile devices account for the majority of virtual tour traffic, touch target sizing isn't optional. A hotspot icon smaller than roughly 44 pixels square becomes frustrating to tap accurately on a phone screen.
Run this checklist before publishing any tour:
- Test on at least one iOS device, one Android device, and two desktop browsers.
- Confirm hotspot panels never block the main navigation controls; use lightweight overlays instead of full-screen takeovers.
- Add alt text to every hotspot icon so screen readers can describe its function.
- Verify keyboard focus order moves logically through hotspots for users who can't operate a touchscreen or mouse.
- Check color contrast on hotspot panels against WCAG AA minimums, especially white text over light photo backgrounds.
- Build a fallback: if a device doesn't support the interactive layer, show a static image with a text-based menu of the same content.
Progressive enhancement matters here. The core tour should function even if a hotspot fails to load, degrading gracefully rather than breaking the whole scene.
How Do You Measure and Improve Hotspot Performance?
Instrumenting hotspots turns guesswork into a feedback loop. Track raw clicks, click-through rate by hotspot type and scene, time spent inside each panel, and downstream conversion events like calls, form submissions, or bookings, all standard analytics practices for optimizing tours.
- Pull scene-by-scene heatmaps monthly to spot hotspots nobody clicks, then either relocate or cut them.
- Run simple A/B tests, one variable at a time, comparing icon style, copy phrasing, or placement position.
- Connect booking or contact hotspots directly to your CRM so a click can be traced all the way to a closed deal or reservation.
- Review performance every two to four weeks for active listings, longer for evergreen tourism content.
- Kill or redesign any hotspot sitting below your site's average CTR for two consecutive review cycles.
Treat this as ongoing maintenance, not a one-time setup task.
Who's Behind This Guidance and What Proves It Works?
This guide comes from Andrea, whose work on virtual tour production informs the practical checklists throughout.
Simple Virtual Tour built its platform around the workflow described here, supporting both cloud-hosted and self-hosted deployment, live session hosting, e-commerce integration, and an intuitive backend, and it currently serves over 1,400 users creating tours across real estate, tourism, and hospitality. For deeper implementation help, the hotspot design checklist and the real estate hotspot creation guide walk through scene-by-scene authoring in more detail.

Why Most Hotspot Advice Undersells the Basics
The conventional advice on hotspots spends too much energy on quantity, urging creators to cram every scene with clever features, and not enough on sequence. What the research actually supports is narrower and more useful: get the first three seconds right, cap your hotspot count, and write shorter panel copy than feels comfortable.
Most tours I've seen fail not because they lack features but because every hotspot competes for the same attention instead of taking turns. Progressive disclosure, showing context first and action second, is the most underrated lever in this entire discipline, and it costs nothing to implement.
If you're starting from scratch, don't chase a feature checklist. Pick one scene, apply the 3-second rule to a single hotspot, measure the click rate, and only then decide whether to add complexity. Mobile sizing and load speed matter more than any icon design choice you'll agonize over. Get the fundamentals right before you touch the extras.
— Andrea
Build Hotspots That Actually Get Clicked
Simple Virtual Tour is built for the exact workflow this guide describes: authoring hotspots, deploying them fast, and measuring what happens after the click, without stitching together three separate tools to do it. Whether you need cloud hosting for quick turnaround or a self-hosted setup to keep full control of your data and costs, the platform handles hotspot creation, media embedding, and e-commerce links inside one intuitive backend.
Here's what comes built in for hotspot-heavy tours:
- Self-hosted or cloud deployment, your choice, with no forced lock-in either way
- Mobile-first hotspot rendering that respects the touch-target sizing covered above
- Built-in analytics to track clicks, CTR, and scene-level engagement
- Live session hosting so an agent or guide can walk a client through hotspots in real time
- Native e-commerce integration for product and booking hotspots
Over 1,400 users are already running tours on this infrastructure. If you're ready to move from planning to a published tour, try Simple Virtual Tour today and get your first scene live with working hotspots this week.
Sources
The placement and engagement figures throughout this guide draw on the Interactive Hotspots in Virtual Tours best practices guide, the Interactive 3D Tour benefits and best practices overview, and Topic Territory's analysis of interactive 360° tours. For hands-on next steps, see the floor plan integration guide and hotel room tour creation guide.
- Interactive Hotspots in Virtual Tours: Best Practices Guide
- Interactive 3D Tour: Benefits, Uses & Best Practices