

The fastest reliable way to execute virtual tour floor plan integration is to import a clean 2D plan, map room hotspots to their corresponding panoramic scenes, enable a real-time radar indicator, and optimize all assets for mobile performance. Simple Virtual Tour handles each of these steps through an intuitive backend that requires no coding knowledge.
Every professional integration needs these minimum elements:
- A clean floor plan image (PNG, JPG, or SVG) sized for web delivery
- Hotspots placed on each room and linked to the correct panorama scene IDs
- A calibrated radar or field-of-view indicator showing viewer orientation
- A multi-floor toggle for properties with more than one level
- Responsive embed code tested on desktop, tablet, and mobile
Standards to keep in mind: WCAG 2.1 for accessibility compliance and Google Maps Platform SDKs when you need routing or external map overlays alongside your tour.
Table of Contents
- How does virtual tour floor plan integration actually work, step by step?
- Where do you get the floor plan for your virtual tour?
- What features should a floor plan integration platform actually have?
- UI, accessibility, and testing best practices before you publish
- Cloud vs. self-hosted: how should you publish and deploy your tour?
- How Simple Virtual Tour handles floor plan integration in practice
- Which virtual tour platforms support floor plan integration out of the box?
- Key Takeaways
- Why floor plan integration changes what a listing actually does
- Start building with Simple Virtual Tour today
- Useful resources for implementation and SDKs
How does virtual tour floor plan integration actually work, step by step?
A well-structured workflow turns a raw floor plan and a set of panoramas into a navigable, spatially coherent experience. Here is the sequence that works reliably across platforms.
-
Prepare and export your floor plan. Export from your architectural software or sketching tool as a high-resolution PNG or SVG. Remove unnecessary annotations that clutter the mobile view. Name the file with the property address and floor number (e.g.,
123-main-st-floor1.png) so your project folder stays organized from day one. -
Upload the floor plan to your tour platform. Most platforms accept standard image formats. Upload each floor as a separate file rather than combining levels into one image. This keeps hotspot targets readable on small screens.
-
Import or capture your panoramas. Upload your equirectangular images (360° panoramas) and assign each one a clear scene ID that matches a room name (e.g.,
living-room,master-bed). Consistent naming pays off when you review analytics later. -
Place and link hotspots. Drop a hotspot marker onto each room on the floor plan, then link it to the corresponding scene ID. Double-check every link before moving on; a broken hotspot is the most common QA failure.
-
Calibrate the radar indicator. Rotate the radar icon on the floor plan until it matches the starting heading of your first panorama. Then walk through a full 360° rotation in the panorama viewer and confirm the radar updates in real time. This alignment step is where most teams skip ahead and regret it later.
-
Configure multi-floor support. For properties with two or more levels, set up separate floor layers and add a visible floor-switcher control. Label each layer clearly ("Ground Floor," "Second Floor") rather than using numbers alone.
-
Optimize assets for performance. Compress your floor plan image to keep mobile load times acceptable while preserving legibility. Use tiled images or SVG formats where possible for crisp, scalable rendering.
-
Run a full QA pass. Test on desktop Chrome, Safari on iOS, and a mid-range Android device on a 4G connection. Verify hotspot clicks, radar movement, floor switching, and keyboard navigation.
Pro Tip: Name your panorama scenes with room labels rather than sequential numbers (e.g., kitchen instead of scene_04). Analytics platforms report by scene ID, so readable names let you spot which rooms viewers skip most often.
Pre-publish testing checklist:
- All hotspots open the correct panorama scene
- Radar rotates accurately through a full 360° sweep
- Floor toggle switches layers without a full page reload
- Floor plan image loads within two seconds on a 4G connection
- Keyboard users can tab to each hotspot and activate it with Enter
- Alt text is present on the floor plan image
Where do you get the floor plan for your virtual tour?
You have four practical routes, and the right one depends on your timeline, budget, and accuracy requirements.
| Method | Speed | Accuracy | Cost | Best For |
|---|---|---|---|---|
| Manual upload (architectural drawing) | Fast | High | Low | New builds, architect-supplied plans |
| Auto-generate from existing tour | Very fast | Moderate | Low/included | Quick listings, resale properties |
| Mobile/LiDAR scanning | Moderate | High | Low–Moderate | Older properties without drawings |
| Done-for-you service | Slow (1–3 days) | Very high | Higher | Luxury listings, legal measurement needs |
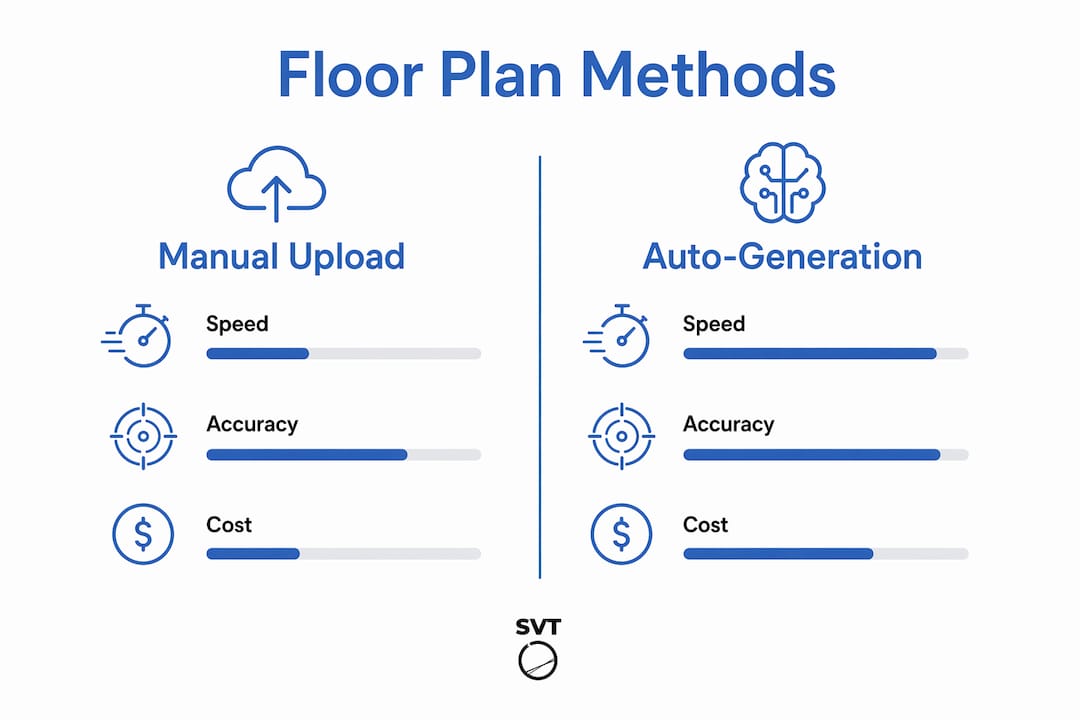
Manual upload works well when you already have an architectural drawing or a clean export from tools like Floorplanner or RoomSketcher. Even a sharp photograph of a printed plan can work for a basic listing, though distortion from camera angle reduces accuracy.
Auto-generation pulls a schematic plan directly from your panorama data. It is the fastest option and good enough for most residential resale listings where buyers want spatial context rather than precise measurements.
Mobile LiDAR scanning (available on recent iPhone Pro models and some Android devices) produces measured floor plans in minutes. Accuracy is solid for rooms under roughly 1,000 square feet, though complex geometries can introduce variance. For listings where gross living area (GLA) figures matter legally, verify the output against an appraiser's measurement.
Done-for-you services are worth the extra cost on luxury properties, commercial spaces, or any listing where measurement accuracy affects the asking price or legal disclosure. Turnaround is typically one to three business days.
- Use manual upload when you already have the file and want full control over presentation.
- Choose auto-generation for speed on standard residential listings.
- Use LiDAR scanning when no drawing exists and you need more than a schematic.
- Commission a done-for-you plan when accuracy is a contractual or marketing requirement.
What features should a floor plan integration platform actually have?
Not every platform that claims floor plan support delivers the same depth. Here is a practical checklist to use during vendor demos.
Must-have features:
- Hotspot-to-scene linking with a visual editor (no manual coordinate entry)
- Real-time radar or field-of-view indicator that updates as the viewer rotates
- Multi-floor layer support with a labeled floor switcher
- Responsive embed output (iframe or JavaScript snippet) that adapts to any screen width
- Image compression or upload-size controls to protect mobile performance
- Keyboard-navigable hotspots with ARIA labels for accessibility
- Export or sharing options (direct link, embed code, QR code)
Nice-to-have features:
- Dollhouse 3D view for a volumetric overview of the property
- Measurement overlays showing room dimensions on the floor plan
- Hotspot-level analytics (click counts, dwell time per room)
- White-label branding so the tour carries your logo, not the platform's
- Live session support for guided remote walkthroughs
- API access for custom integrations with CRM or listing platforms
Operational considerations:
- Self-hosting option for teams that need full data control
- File-size limits and CDN delivery for consistent global performance
- Documented support channels and response times
Demo checklist: During any vendor demo, ask the rep to place a hotspot, link it to a scene, rotate the radar 360°, switch floors, and embed the result in a test page. If any of those four steps requires a support ticket, the platform is not ready for production use.
UI, accessibility, and testing best practices before you publish

Publishing before you test is the single most common mistake in virtual tour production. A few hours of structured QA prevents the kind of broken experience that sends buyers back to the listing photos.
UX priorities:
- Place the floor-level toggle where it is visible without scrolling, especially on mobile
- Use hotspot icons with enough size and contrast to be tappable on a 375px-wide screen
- Keep the radar indicator visible at all times, not hidden behind a menu
- Provide zoom and pan controls that work with both mouse and touch gestures
Accessibility requirements (WCAG 2.1):
- Every hotspot must be reachable via keyboard Tab key and activatable with Enter or Space
- The floor plan image needs descriptive alt text (e.g., "Ground floor plan of 123 Main St showing living room, kitchen, and two bedrooms")
- Hotspot labels should use ARIA attributes so screen readers announce the destination room
- Color contrast on hotspot icons and labels must meet a minimum 4.5:1 ratio against the floor plan background
Pro Tip: Test your tour on a real device in airplane mode with Wi-Fi only at throttled speed (Chrome DevTools lets you simulate "Slow 3G"). If the floor plan image takes more than three seconds to appear, compress it further or switch to SVG.
Performance targets:
- Floor plan image: compress to keep the file small while preserving legibility
- Panoramas: use lazy loading so only the active scene loads on initial view
- Run load tests on desktop, tablet, and mobile across both 4G and Wi-Fi scenarios
Analytics events to configure before launch:
- Hotspot click (which room, which session)
- Floor switch event (from floor X to floor Y)
- Session duration and exit scene
These three events tell you exactly where viewers spend time and where they drop off, which is the data you need to improve future listings.
Cloud vs. self-hosted: how should you publish and deploy your tour?
Deployment choice affects cost, performance, data privacy, and how quickly you can get a listing live. Here is how the two main routes compare.

| Factor | Cloud-hosted | Self-hosted |
|---|---|---|
| Speed to publish | Minutes | Hours to days (initial setup) |
| Maintenance | Managed by vendor | Your team's responsibility |
| Data control | Vendor's servers | Your own infrastructure |
| Ongoing cost | Monthly or yearly subscription | One-time purchase plus hosting |
| CDN delivery | Typically included | Requires your own CDN setup |
| White-label | Available on most plans | Full control |
Embedding and distribution options are consistent across both models: iframe embed for listing pages, direct shareable link for email campaigns, and QR code for print materials. For embedding a property tour on a listing page, a responsive iframe is the most reliable approach across MLS portals and personal real estate sites.
Google Maps Platform's 3D Maps SDK is worth evaluating when your tours need routing overlays or external map context, such as showing a property's walkability or proximity to amenities alongside the floor plan view.
Security and privacy considerations:
- Floor plan images reveal property layout in detail; restrict public access to tours for off-market listings using password protection or access tokens
- 360° imagery can capture personal items; review panoramas before publishing and blur or remove sensitive content
- For self-hosted deployments, configure your web server to block directory listing so raw image files are not directly indexable
- Use HTTPS for all embedded tours; mixed-content warnings break iframe embeds on secure listing pages
Site uptime and load time directly affect how long buyers stay on a listing page. A tour that fails to load is worse than no tour at all, so monitoring your hosting environment is part of the publishing workflow, not an afterthought.
How Simple Virtual Tour handles floor plan integration in practice
A typical residential listing workflow in Simple Virtual Tour runs like this:
- Day 1 (Capture): Photograph the property with a 360° camera. Export equirectangular images and collect or prepare the floor plan file.
- Day 1–2 (Import and mapping): Upload the floor plan and panoramas to Simple Virtual Tour. Use the visual hotspot editor to place and link each room. Calibrate the radar indicator.
- Day 2 (QA): Run the pre-publish checklist: hotspot links, radar accuracy, floor switching, mobile load time, keyboard navigation.
- Day 2–3 (Publish): Deploy via cloud hosting for same-day publishing, or package for self-hosted deployment if data control is a priority.
Simple Virtual Tour supports both cloud and self-hosted deployment, white-label branding, Google Street View publishing, analytics tied to hotspot interactions, and a multilingual interface. The platform's over 1,400 active users include real estate agents, hospitality professionals, and architects who need reliable floor-plan-integrated tours without a developer on staff.
For teams managing multiple listings, the SaaS multi-user plugin lets you run separate client accounts under one dashboard, which keeps branding and analytics cleanly separated per property or client.
What to expect in a trial: the demo environment lets you test hotspot mapping, radar calibration, multi-floor toggling, and the embed output before committing to a plan. White-label options and Google Street View publishing are available on paid tiers.
Which virtual tour platforms support floor plan integration out of the box?
Floor plan support varies significantly across the market. When evaluating platforms, look for these specific capabilities rather than accepting a generic "floor plan feature" claim.
Platforms that support floor plan integration typically fall into two categories. The first group offers a visual drag-and-drop editor where you upload a floor plan image, place hotspot markers, and link each to a panorama scene without writing any code. This is the approach used by Simple Virtual Tour and is appropriate for most real estate and hospitality workflows.
The second group targets developers and offers SDK-level control. The Archilogic Floor Plan SDK and the gospace Floorplan SDK both support 2D and 3D rendering modes, programmatic marker placement, pan/zoom APIs, and JavaScript or TypeScript integration. These are the right tools when you need a custom-built experience embedded in a property portal or CRM, rather than a standalone tour link.
For teams that need advanced building measurement tools alongside their floor plan workflow, third-party proptech integrations can complement a tour platform's native features.
The key compatibility questions to ask any platform:
- Does it support multi-floor layers with a labeled switcher?
- Can hotspots be linked to specific scene IDs, or only to sequential scene numbers?
- Does the radar update in real time, or only on scene load?
- Is the embed output responsive without additional CSS work?
Key Takeaways
Integrating a floor plan with a 360° virtual tour requires a clean plan file, accurately linked hotspots, a calibrated radar indicator, and mobile-optimized assets before you publish.
| Point | Details |
|---|---|
| File preparation matters | Export floor plans as PNG or SVG and name scenes by room for readable analytics. |
| Radar calibration is critical | Match the radar icon to the starting panorama heading and verify through a full 360° rotation. |
| Mobile optimization is non-negotiable | Compress floor plan images and lazy-load panoramas to keep load times acceptable on 4G. |
| Accessibility requires explicit setup | Add alt text, ARIA labels, and keyboard navigation to every hotspot before publishing. |
| Simple Virtual Tour covers the full workflow | Cloud and self-hosted deployment, white-label branding, and a visual hotspot editor support the complete integration process. |
Why floor plan integration changes what a listing actually does
Most real estate professionals treat the floor plan as a supplementary document, something attached as a PDF below the photos. That framing misses the point entirely. A floor plan embedded directly in a virtual tour does something a standalone image never can: it keeps the viewer spatially oriented while they explore, which means they spend more time in the tour and arrive at a showing with a genuine understanding of the property.
The spatial context is what converts a passive browser into a qualified lead. When a buyer can click from the floor plan into a room, look around, and then return to the plan to understand how that room connects to the rest of the house, they are building a mental model of the property. That mental model is what drives a showing request. Without it, even a beautifully photographed listing can feel like a disconnected set of images. Interactive tours outperform photo galleries precisely because they deliver that spatial coherence.
The radar indicator is a small feature that carries more weight than most agents realize. It tells the viewer which direction they are facing relative to the floor plan, which eliminates the disorientation that causes people to exit a tour early. Keeping that indicator calibrated and visible is not a technical nicety. It is a direct factor in how long someone stays engaged with your listing.
Start building with Simple Virtual Tour today
If you want to put a floor-plan-integrated tour live on your next listing without hiring a developer or committing to a long-term contract, Simple Virtual Tour is a direct path to that outcome. The platform gives you a visual hotspot editor, real-time radar calibration, multi-floor support, white-label branding, and both cloud and self-hosted deployment options under one roof.
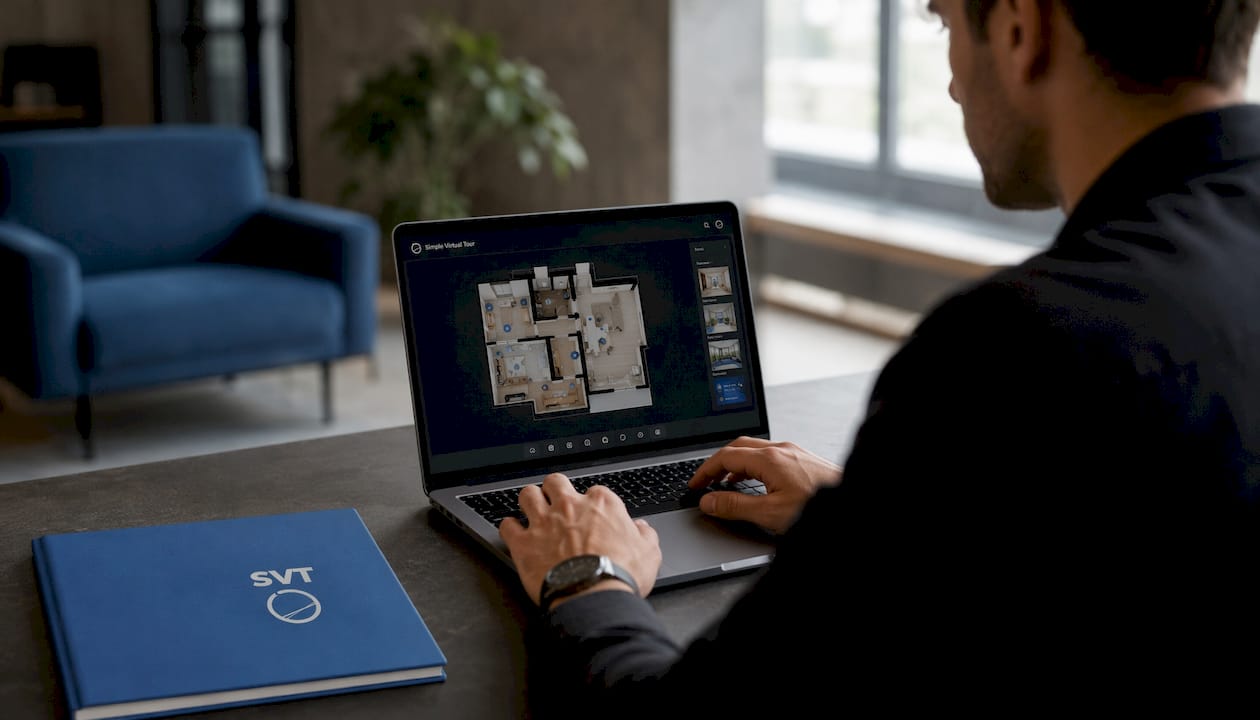
The free trial lets you test the full workflow: upload a floor plan, place hotspots, calibrate the radar, and preview the embed output before you pay anything. Cloud plans run on a monthly or yearly subscription; the self-hosted option is a one-time purchase with optional paid plugins for multi-user management and advanced analytics. To see pricing and choose your deployment model, visit the Simple Virtual Tour plans page and start your trial today.
Useful resources for implementation and SDKs
These references support deeper implementation work beyond the platform UI:
- Simple Virtual Tour platform overview — deployment options, feature list, and trial access
- Simple Virtual Tour blog — how-to guides covering capture workflows, embedding, and tour design
- Embedded property tour guide — iframe embedding, responsive design, and SEO considerations
- Interactive hotel room tour guide — capture and mapping workflow for constrained single-room spaces
- Archilogic Floor Plan SDK guide — JavaScript/TypeScript SDK for custom embedded floor plan experiences
- gospace Floorplan SDK overview — 2D/3D rendering, pan/zoom, and marker APIs for web app integration
- Google Maps Platform 3D Maps — mapping SDK for routing overlays and external map context alongside virtual tours
For self-hosted deployments or custom API integrations, contact Simple Virtual Tour support directly. The SDK documentation for Archilogic and gospace is the right starting point for teams building floor plan viewers into proprietary portals or CRM platforms.