
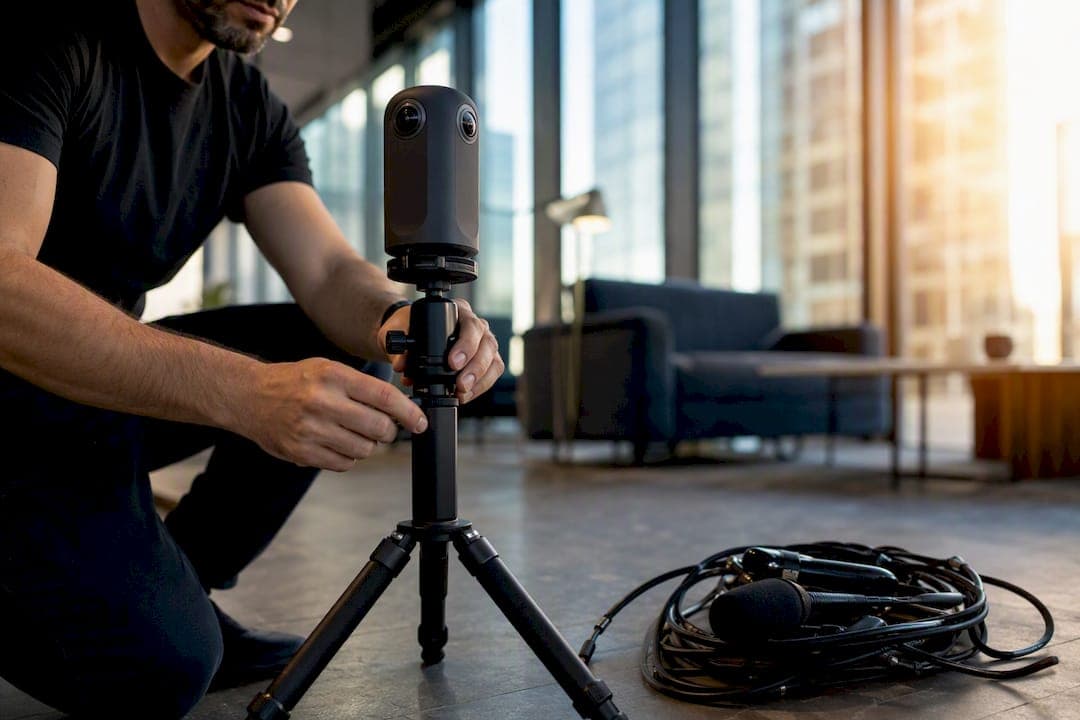
A 360 video tour is a continuous panoramic recording captured from a fixed point, letting viewers look around by dragging their screen or tilting a headset while the footage plays. Use it when you want a short, cinematic burst of immersion, like a destination trailer or an event highlight. If you need viewers to explore multiple rooms or areas at their own pace and capture leads along the way, a navigable 360 virtual tour built from stitched panoramas fits the goal better.
TL;DR:
- A 360 video is ideal for short, cinematic content like trailers or event highlights, but not suitable for detailed exploration.
- Navigable virtual tours better serve real estate, museums, and retail by enabling user-controlled navigation and embedded lead capture.
- Hardware choices, such as prosumer versus enterprise cameras and stabilization methods, significantly impact file size, post-production complexity, and image quality.
- Consistent lighting, proper audio recording, and smooth scene transitions are crucial for creating immersive and professional 360 content.
- Using simple platforms for quick assembly and both cloud or self-hosted options helps streamline the publishing process and control costs.
Table of Contents
- 360 Video Tours vs. Navigable Virtual Tours vs. Digital Twins
- Cameras, Drones, and Audio Gear for 360 Capture
- How to Produce a 360 Video Tour, Step by Step
- Where and How to Publish Your 360 Tour
- Realistic Costs and Timelines for 360 Projects
- Best Practices to Keep Tours Smooth and Immersive
- Building Interactive Tours Faster With Simple Virtual Tour
- Getting Lighting and Sound Right for 360 Capture
- Color Grading and Sound Design in 360 Post-Production
- How Viewers Interact With and Navigate 360 Tours
- Quick Decision Guide: Video or Interactive Tour?
- Publish Your First Interactive Tour This Week
- Primary Sources and Further Reading
- Sources
360 Video Tours vs. Navigable Virtual Tours vs. Digital Twins
These three formats get lumped together constantly, and that confusion costs people money on the wrong equipment or the wrong platform. Each one solves a different problem.
A fixed-point 360 video is continuous footage: the camera stays put (or moves smoothly, as with a drone or gimbal) and records everything at once. It plays like a movie. Viewers watch passively, just choosing where to look, and the files run large because you're streaming full-motion video in every direction simultaneously.
A navigable interactive tour, by contrast, stitches together individual panoramic photos and connects them with clickable hotspots. Viewers move room to room on their own schedule, and you can drop in lead-capture forms, product links, or informational overlays at any point. Because the tour serves discrete panoramas rather than one long video stream, it loads noticeably faster on mobile connections.
A digital twin goes a step further, layering LiDAR or depth-sensor data onto the panoramas for accurate scale and geometry. That precision matters for architecture, facilities management, or insurance documentation, but it's often unnecessary for a marketing tour that just needs to look good and convert visitors.
- 360 video: best for trailers, event recaps, brand storytelling
- Navigable tour: best for real estate listings, museum previews, retail walkthroughs, lead generation
- Digital twin: best for architecture, construction documentation, facilities audits
Cameras, Drones, and Audio Gear for 360 Capture
Your hardware choice shapes everything downstream, from file size to how much post-production headache you're signing up for.
Prosumer 360 cameras handle most marketing projects fine and cost a fraction of enterprise rigs. Enterprise-grade systems (multi-lens arrays with higher dynamic range) earn their price when you're shooting for large screens, VR headsets, or brand campaigns where stitching seams and low light performance actually get scrutinized.
Drones add altitude and movement but introduce their own challenges. Gyro-stabilized drones are the standard for aerial 360 work because even small wobbles become obvious once footage is projected across a full sphere, and gyro stabilization is now common practice for aerial 360 capture.
- Camera tier: prosumer for social and web, enterprise for VR and large-format display
- Stabilization: gimbals for handheld shots, gyro rigs for aerial
- Audio: ambisonic microphones capture directional sound so audio shifts as the viewer looks around, which matters far more in 360 than in flat video
- Export: 4K or 8K resolution encoded to .mp4 or .mov covers most web and VR playback needs
How to Produce a 360 Video Tour, Step by Step
Whether you're shooting it yourself or briefing a vendor, the workflow follows the same five stages.
- Plan before you shoot. Define the goal (brand awareness, lead generation, training), sketch a rough storyboard of shots or panorama points, confirm access and permissions for the location, and map out logistics like lighting windows and crew movement.
- Capture with discipline. For panoramas, bracket your exposures so bright windows and dark corners both hold detail. Keep the tripod at a consistent height between shots, and if you're filming motion, plan camera movement carefully since anything jerky becomes disorienting once wrapped around a viewer's entire field of view.
- Stitch and edit. Stitching software merges the individual lens feeds into one seamless sphere. This is also where you handle color correction and manage genuinely large source files, since raw 360 footage eats storage fast.
- Assemble the interactive layer. If you're building a navigable tour rather than a straight video, this is where hotspots, calls-to-action, embedded media, and analytics tracking get added to each panorama.
- Optimize and export. Compress for the delivery target. A tour meant for mobile viewing needs a different compression profile than one destined for a VR headset on a fast connection.
Pro Tip: Shoot a few extra seconds of static footage at the start and end of each panorama sequence. It gives your editor breathing room to trim clean transitions instead of cutting mid-motion, which is one of the fastest ways to make a 360 video feel amateurish.
Where and How to Publish Your 360 Tour
Once the tour is built, you need somewhere for people to actually watch it, and this decision affects both cost and control.
A cloud-hosted SaaS platform handles servers and updates for you, trading a little control for convenience and speed to launch. Self-hosting gives you full ownership of the data and cuts recurring costs over time, at the price of managing your own infrastructure. Third-party video platforms are the easiest on-ramp for pure 360 video but offer far less customization for a branded, lead-generating experience.
- Embed tours directly on your website or share them through social channels; platforms like YouTube support native 360 video playback
- Confirm compatibility across browsers, phones, and VR headsets, and build in a flat-image fallback for older devices
- Live guided sessions, where a host walks a remote viewer through the tour in real time, tend to boost engagement well beyond a self-guided browse
Realistic Costs and Timelines for 360 Projects
Budgets vary enormously depending on ambition, so it helps to think in three tiers.
A DIY shoot with a prosumer camera and free editing software might cost a few hundred dollars in equipment and a weekend of your time. Hiring a professional for a single-location interactive tour typically runs from several hundred to a few thousand dollars, covering a half-day shoot plus stitching and hotspot setup. Enterprise projects involving digital twins, multiple locations, or aerial footage push into the tens of thousands, largely because of the specialized scanning equipment and processing time involved.
- Capture: a few hours for a single space, multiple days for large or multi-location properties
- Post-production: a few days for a straightforward interactive tour, longer for color-graded video with sound design
- Cost drivers: interactivity level, LiDAR scanning, drone shoots, multilingual localization, and custom branding all add time and expense
Best Practices to Keep Tours Smooth and Immersive
Most 360 problems trace back to a handful of preventable mistakes.
Keep exposure consistent across every panorama in a sequence. Mismatched lighting between shots is the single fastest way to make stitching seams and transitions look obvious. Match horizon lines and use consistent camera height, since smooth transitions with aligned horizons reduce the motion discomfort some viewers feel in 360 content.
For mobile performance, serve tiled or adaptive-resolution images rather than one continuous high-bitrate video wherever the format allows. It cuts bandwidth without a noticeable drop in visual quality.
- Check every hotspot link and transition before launch
- Test playback on at least one phone, one desktop browser, and one VR headset if you're targeting that audience
- Verify audio sync if you're using ambisonic sound
- Confirm load times on a standard mobile connection, not just office Wi-Fi
Pro Tip: Watch your finished tour on mute first. If the visual transitions still feel smooth and logical without sound carrying the pacing, your navigation design is solid.
Building Interactive Tours Faster With Simple Virtual Tour
Producing the video is only half the job. Turning it into a polished, navigable experience is where most DIY projects stall out. Simple Virtual Tour handles the assembly layer: hotspot placement, hosting, and analytics come built into the backend, so you're not stitching together three separate tools to publish one tour.

The platform supports both cloud-hosted and self-hosted deployment, which matters if you need full control over where your data lives versus wanting something live in an afternoon. Marketers get lead-gating options, e-commerce integration, and a multilingual interface without touching code.
Over 1,400 users currently run tours on the platform, spanning real estate, tourism, and education. Its guides on 360 photography and photogrammetry walk newcomers through capture basics before they ever open the tour builder.
- Hotspot and overlay assembly without custom development
- Live guided session hosting for remote walkthroughs
- Cloud or self-hosted deployment depending on your data and cost priorities
Getting Lighting and Sound Right for 360 Capture
Lighting mistakes that barely register in flat video become glaring in 360 because the camera sees everything at once, including the light sources themselves.
Avoid harsh single-direction lighting. A lamp or window that looks fine in a normal frame can blow out one section of your panorama while leaving the opposite side dark, and stitching software struggles to blend those extremes smoothly. Diffused, even lighting across the whole space works far better than dramatic directional setups you might use for standard video. If you're shooting outdoors, overcast conditions or the golden hours near sunrise and sunset give you softer shadows across the entire sphere rather than one blinding hot spot.
Audio deserves equal attention, and it's the piece most beginners skip entirely. Standard stereo microphones don't translate well to an environment where the viewer is turning their head. Ambisonic audio captures sound from all directions and adjusts what the viewer hears based on where they're looking, which makes footsteps, ambient noise, or a narrator's voice feel anchored to the actual space instead of floating flatly over the video.
If ambisonic gear isn't in your budget, at minimum record clean ambient sound on location separately from your voice narration. Layering them in post gives you far more control than relying on a camera's built-in mic, which tends to pick up handling noise and wind far more aggressively in 360 rigs than in traditional camera housings. A short burst of room tone recorded in silence also gives your sound editor something clean to fill gaps with later.
Color Grading and Sound Design in 360 Post-Production
Post-production is where a technically correct 360 video becomes a genuinely engaging one, and the biggest mistake is treating it like flat video editing with an extra step.
Color grading in 360 has to account for the fact that different parts of the sphere were often shot under slightly different lighting, even within the same panorama. Apply grading adjustments globally across the whole sphere rather than to a single visible frame, since a viewer might be looking at any part of the image at any moment. Consistency across the full 360 degrees matters more than any single dramatic look.
Sound design carries more weight in 360 video than in traditional formats because it helps orient viewers who might not be looking where the action is happening. A sound cue placed behind the viewer's current view naturally pulls their attention that direction, which is a subtle but effective way to guide someone through a scene without visible arrows or text. Layer ambient sound, directional effects, and narration in separate tracks so you can adjust each independently once you're syncing to the final edit.
Keep transitions between scenes simple. Hard cuts can be jarring in 360 because the viewer loses their spatial orientation entirely for a moment. A brief fade or a matched-motion cut, where the camera movement continues logically from one shot into the next, keeps viewers oriented and reduces the disconnected feeling that makes some 360 content hard to watch for more than a minute or two.
How Viewers Interact With and Navigate 360 Tours
Navigation design is where 360 video and interactive tours genuinely diverge, and it shapes how long people actually stay engaged.
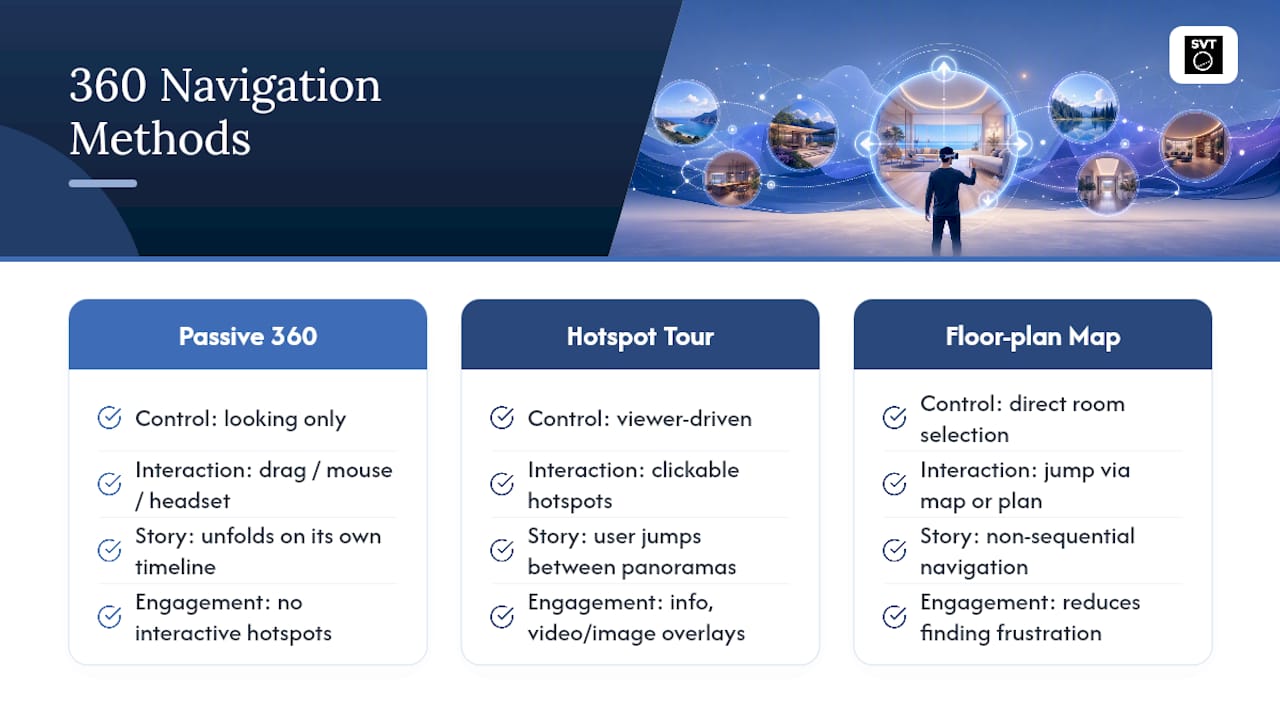
In a straight 360 video, viewer interaction is limited to looking around. They drag on a touchscreen, use a mouse, or turn their head in a headset, but the story unfolds on its own timeline regardless of what they're looking at. That works well for short, cinematic content where you're guiding attention through sound design and camera movement rather than user choice.
Interactive tours hand the viewer control. Hotspots let them jump between panoramas, click for more information, or trigger a video or image overlay embedded in the scene. Well-designed hotspots and lead-capture widgets turn a passive viewing experience into something closer to a guided self-service showroom, which is exactly why real estate and retail lean on this format over straight video.
Some platforms also support a floor-plan or map overview, letting viewers jump directly to a specific room instead of clicking through every connected panorama in sequence. That single feature dramatically cuts frustration for anyone trying to find one specific area in a large property or venue. Building effective hotspots that feel intuitive rather than hidden is one of the more underrated skills in this entire production process, and it's usually the difference between a tour people finish and one they abandon after the first room.
Quick Decision Guide: Video or Interactive Tour?
If your goal is attention and emotional impact in under two minutes, shoot 360 video. If your goal is sustained engagement or lead capture, build a navigable tour instead. A solo creator promoting a hiking trail wants the cinematic pull of video; a real estate agent listing a property wants a tour viewers can explore and act on. When in doubt, start with the interactive tour; it typically does more marketing work per dollar spent.
— Andrea
Publish Your First Interactive Tour This Week
Reading about workflows is useful, but the fastest way to understand 360 tours is to build one. Simple Virtual Tour gives you an easy backend for assembling hotspots and overlays, unlimited tours on your account, and built-in live session hosting for walking remote visitors through a space in real time.
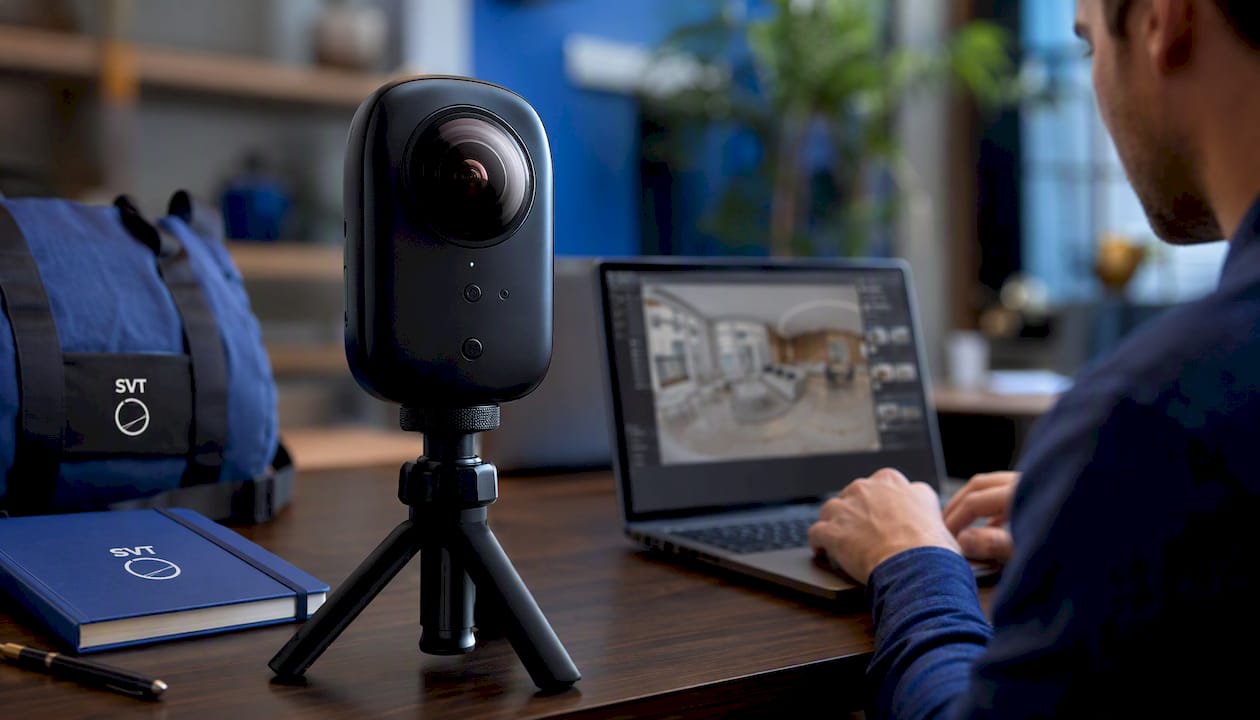
You choose the deployment that fits your situation: cloud-hosted if you want something live fast, or self-hosted if you want full control over your data and lower long-term costs. Either way, you're not stitching together separate tools for hosting, analytics, and hotspot design. If you're ready to move from planning to publishing, start with Simple Virtual Tour and get your first tour live this week.
Primary Sources and Further Reading
- AirPano — 360° video and panoramas
- How to Create a Virtual Tour: Matterport & Insta360
- Virtual tour market report (Grand View Research)
- Simple Virtual Tour Blog
Sources
- AirPano — 360° video and panoramas
- How to Create a Virtual Tour: Matterport & Insta360
- Virtual tour market report (Grand View Research)