
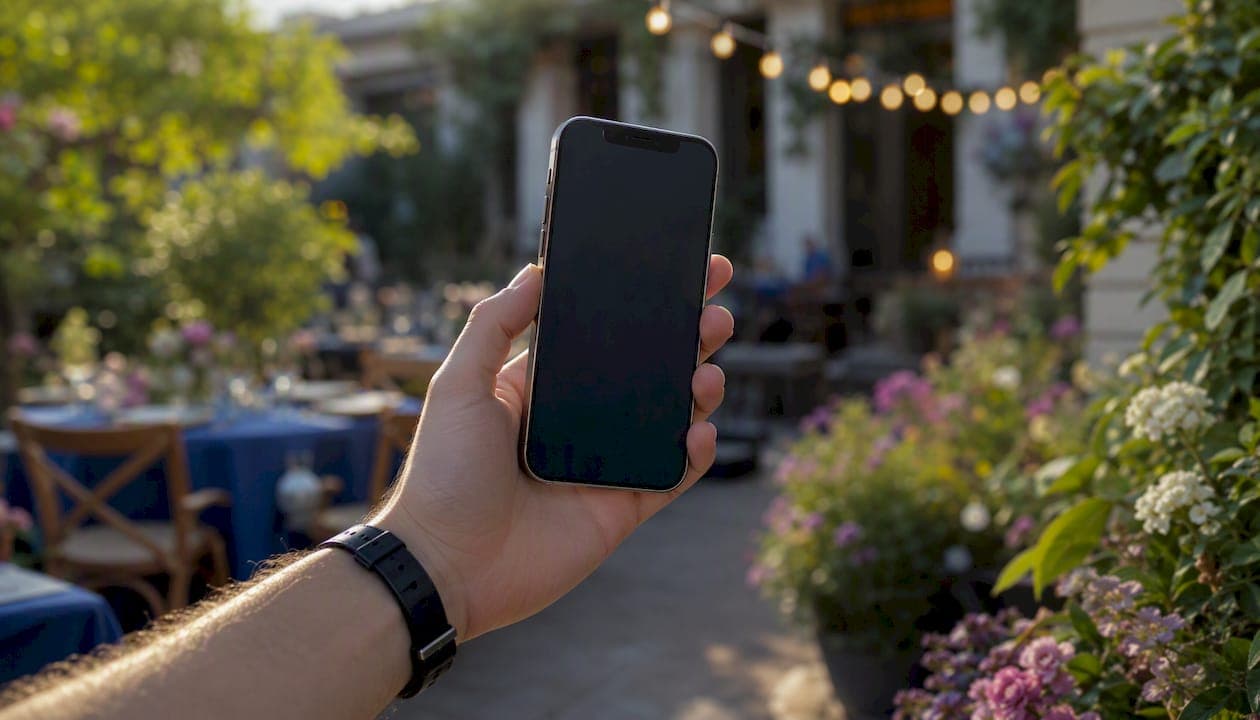
Yes, you can capture, process, and publish a production-ready 360° virtual tour using only an iPhone and a mobile-first hosting platform. The typical workflow runs five steps and, for a single room, can be completed in under 45 minutes.
Here is the minimal path from shoot to shareable link:
- Capture: Use your iPhone's 360 photo mode or a LiDAR scan app
- Upload: Transfer files via a mobile app or direct browser upload
- Process: Cloud stitching or on-device AI assembles the equirectangular panorama
- Publish: Generate an iframe embed code or a direct share link
- Test: Load the tour on a mid-range Android device over 4G to verify PWA and touch navigation
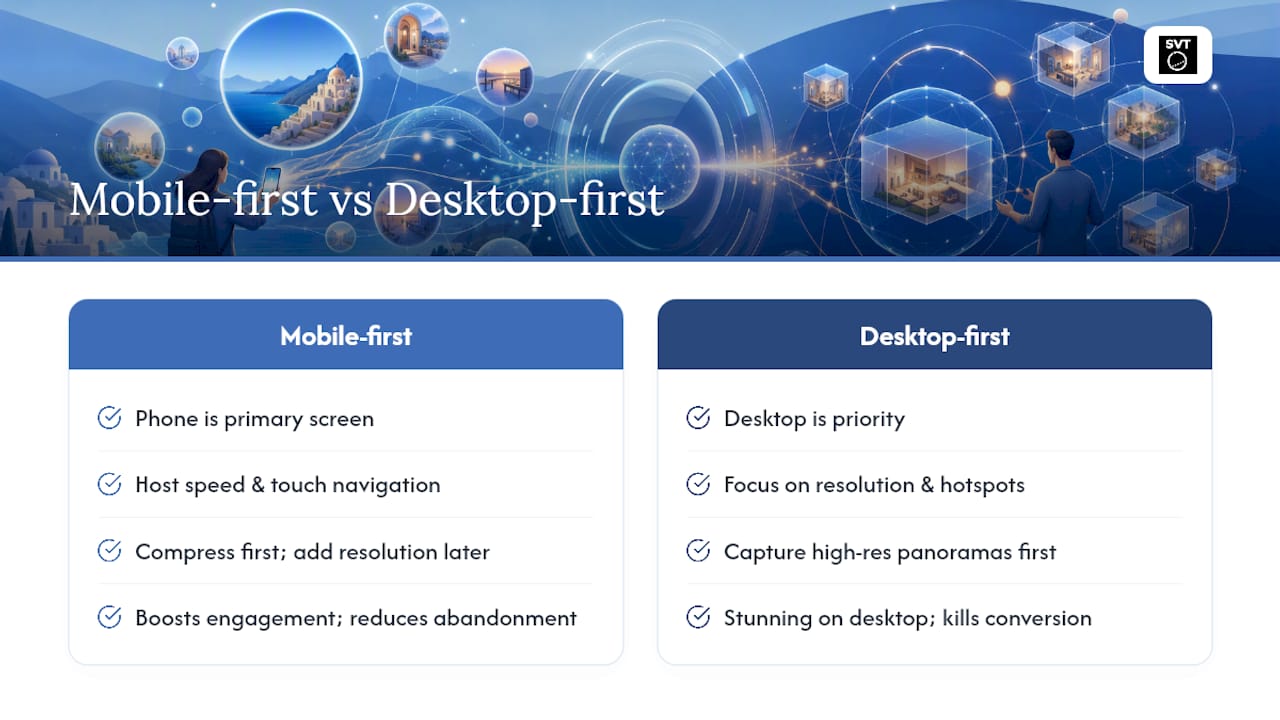
Mobile-optimized tours reduce abandonment when layout, load speed, and touch navigation are prioritized. That single factor matters more than image resolution for most real estate and hospitality use cases. Simple Virtual Tour is a hosting option built around this mobile-first principle, serving a community of users.
Pro Tip: Set your iPhone to Airplane Mode during capture to prevent notification banners from triggering screen taps that interrupt the rotation sequence.
Table of Contents
- How do you capture great 360 content on an iPhone?
- How do you host tours so they load fast and convert on phones?
- How do you design the tour experience for touch?
- How long does capture to publish take, and what does it cost?
- Your shoot-day capture and publish checklist
- What editing and annotation tools can you use?
- How do 360° tours help your SEO?
- How do you fix common capture and processing problems?
- Key Takeaways
- Why mobile-first is the only strategy worth building around
- Simple Virtual Tour: mobile-first hosting built for this workflow
- Useful sources and further reading
How do you capture great 360 content on an iPhone?
LiDAR vs. 360 photo: which mode to use
iPhones 11 and newer can capture professional-quality panoramas using only a capture app and AI stitching. LiDAR is available on iPhone 12 Pro and later Pro models and produces a textured 3D mesh alongside the panorama. For most real estate and hospitality work, 360 photo mode on any iPhone 11+ is sufficient.

| Mode | Best for | Export formats | Key limitation |
|---|---|---|---|
| LiDAR Room Scan | 3D dollhouse views, AR walkthroughs | .glb, .usdz, equirectangular JPG | Pro models only; larger file sizes |
| 360 Photo / Panorama | Fast panorama tours, wide compatibility | Equirectangular JPG | No depth data; no 3D mesh |
Capture workflow that avoids common problems
Stand at the center of the room, hold the phone at chest height, and rotate slowly around the camera lens axis, not your body's center. Rotating around the lens axis prevents parallax error, which is the leading cause of stitching tears and misaligned foreground objects.
Additional rules that consistently produce clean results:
- Lock AE/AF before starting the rotation sequence (long-press the focus point in the camera app)
- Disable HDR to prevent exposure banding between frames
- Keep the scene static: ask people to leave, pause ceiling fans, close curtains on bright windows
- If ghosting appears from a moving object, reshoot only the transition zone rather than the entire scene
- Maintain consistent lighting throughout the property to avoid jarring brightness shifts between rooms
For a deeper walkthrough of the 360-degree photo creation process, the Simple Virtual Tour blog covers mobile-specific capture steps in detail.
How do you host tours so they load fast and convert on phones?
Mobile-friendly real estate tours depend as much on hosting infrastructure as on image quality. Here is how the main deployment options compare:
| Deployment type | Cost shape | Control | Best suited for |
|---|---|---|---|
| Cloud-hosted SaaS | Monthly or yearly subscription | Platform manages CDN and updates | Agents and hospitality teams needing fast setup |
| Self-hosted (one-time purchase) | One-time license fee | Full data and branding control | Studios and agencies with their own server infrastructure |
| Hybrid with CDN | Subscription plus CDN layer | High performance, moderate control | High-traffic museum or event applications |
Embed options follow a similar logic. An iframe is the fastest path to embedding a tour in any website or CMS. A direct link works for email campaigns and social sharing. A PWA (Progressive Web App) unlocks VR headset support and offline caching, which matters for trade show and museum kiosk deployments.
Mobile performance checklist:
- Lazy-load panoramas so the first scene renders before others download
- Serve compressed equirectangulars (4,000 x 2,000 px) as the default mobile asset
- Enable viewer prefetching for the next scene while the visitor explores the current one
- Test on a mid-range Android device over a 4G connection before publishing
Pro Tip: A mid-range Android on 4G is the harshest realistic test environment for a PWA tour. If it loads smoothly there, it will load smoothly everywhere. Avoid testing only on the latest iPhone — that masks real-world performance gaps.
How do you design the tour experience for touch?
Touch-first design starts with hotspot placement. Put navigation hotspots in doorways and at natural transition points, not floating in the middle of a wall. On a phone screen, a touch target smaller than 44 x 44 points is routinely missed, so size hotspot icons generously and add a short text label that tells visitors exactly where they are going.
Set the entry view's initial yaw and pitch to frame the primary selling point: the lobby for a hotel, the kitchen island for a residential listing, the main exhibit for a museum. Visitors who land on a blank wall often leave before exploring further.
For CTAs inside the tour, booking buttons and e-commerce widgets should appear consistently in the same screen position across all scenes. Keep them lightweight: a single tap should open a booking form, not trigger a full page reload. Interactive hotel room tours that integrate booking directly into the viewer see stronger conversion than tours that redirect visitors to a separate page.
Accessibility matters too. Add descriptive alt text to scene labels, verify keyboard and tab order for desktop fallback, and include captions for any audio or guided tour narration. The virtual tour accessibility setup guide from Simple Virtual Tour covers the practical configuration steps.
How long does capture to publish take, and what does it cost?
| Room type | Capture time | Processing time | Total to live link |
|---|---|---|---|
| Single room (panorama) | about 45 minutes | a few minutes | well under an hour |
| Multi-room apartment | about 1–2 hours | under an hour | within a few hours |
| Large property with many rooms | up to several hours | longer processing time | several hours total |
Cost follows the deployment model. Free tiers on most platforms restrict white-labeling and analytics. A cloud SaaS subscription gives you branded embeds, statistics, and support for a recurring monthly or yearly fee. A self-hosted one-time purchase eliminates the subscription but requires your own server and occasional maintenance.
Same-day delivery checklist:
- Assign one person to capture and one to upload and process simultaneously
- Pre-plan hotspot connections before the shoot using a floor plan sketch
- Budget 10–15 minutes per room for hotspot setup and label writing
- Run a final QA pass on a mobile device before sending the client link
Your shoot-day capture and publish checklist
Pre-shoot
- Charge iPhone to 100% and clear at least 5 GB of storage
- Confirm property access and written permission to publish
- Turn on all lights, remove personal items, and ask occupants to leave
- Set iPhone camera to lock AE/AF and disable HDR
Capture
- Stand at room center, hold phone at chest height
- Rotate slowly around the camera lens axis, completing a full 360°
- Capture consistent heights across all rooms
- Shoot each doorway transition zone from both sides
Upload and publish
- Export equirectangular JPEGs (full resolution and mobile-compressed version)
- Upload to your hosting platform and confirm stitching completes without errors
- Add hotspots following your pre-planned floor map
- Copy the iframe embed code or direct share link
Post-publish QA
- Load the tour on a mid-range Android device over 4G
- Tap every hotspot and verify navigation works correctly
- Confirm CTAs and booking buttons open the correct destination
- Check that analytics tracking fires on the first scene load
What editing and annotation tools can you use?
Most capture apps include basic scene-level editing: brightness and contrast adjustments, horizon leveling, and nadir patching (covering the tripod or phone holder at the bottom of the sphere). For annotation, hotspot editors let you attach text labels, image popups, video embeds, and URL links to specific points in the panorama.
Post-processing software adds more control. Desktop tools like PTGui handle manual stitching for complex scenes where AI stitching produces artifacts. For color grading across a multi-room tour, applying a consistent LUT (look-up table) in Lightroom before upload keeps the visual tone uniform. Simple Virtual Tour's built-in AI multimedia editing tools handle many of these adjustments directly in the platform, reducing the need for a separate desktop step.
How do 360° tours help your SEO?
A published 360° tour contributes to SEO through dwell time and structured data. Visitors who interact with a tour spend significantly more time on the page than those viewing static images, and longer sessions send a positive engagement signal to search engines.
Practical steps to maximize SEO value:
- Host the tour on a page with a descriptive title tag and meta description that include location and property type
- Add a structured data markup using
VideoObjectorImageObjectschema where applicable - Write a text description of the tour's content on the same page so crawlers can index the location and features
- Submit the tour's URL to Google Search Console after publishing
- If you use Google Street View export (available in Simple Virtual Tour), the tour can appear directly in Google Maps search results, adding a local SEO signal
Page load speed affects both rankings and user experience. A tour that takes more than three seconds to display its first scene on mobile will increase bounce rate and weaken the SEO benefit the tour was meant to provide.
How do you fix common capture and processing problems?
Stitching seams or tears: Almost always caused by parallax error. Reshoot the scene, rotating around the camera lens axis rather than your body. Keep the phone steady and slow the rotation speed.
Exposure banding: Frames captured at different exposures create visible brightness bands in the stitched panorama. Lock AE/AF before starting the rotation and avoid shooting toward windows without balancing the interior lighting.
Ghosting from moving objects: A person or fan blade that moved between frames creates a ghost image. Reshoot only the affected transition zone under the same lighting conditions.
Black nadir patch: If the bottom of the sphere shows the phone or your feet, use the nadir patching tool in your editing app to replace it with a logo or a blurred fill.
Tour not loading on mobile: Check the equirectangular file size. A 20 MB JPEG will stall on a 4G connection. Downsample to 4,000 x 2,000 pixels for the mobile-served asset and use lazy loading so only the active scene downloads first.
Processing errors on upload: Most errors trace back to non-standard aspect ratios. A valid equirectangular image has a 2:1 width-to-height ratio. Verify this before uploading.
Key Takeaways
A phone-only 360° virtual tour workflow is production-ready today: capture on iPhone, export equirectangular JPEGs, and publish through a mobile-first hosting platform to deliver same-day results that load and convert on phones.
| Point | Details |
|---|---|
| Mobile-first delivery | Prioritize load speed and touch navigation over desktop visual quality to reduce abandonment. |
| Choose the right capture mode | Use LiDAR for 3D mesh exports (.glb/.usdz); use 360 photo mode for fast equirectangular panorama tours. |
| Rotate around the lens axis | Rotating around the camera lens, not your body, prevents parallax error and stitching tears. |
| Test on mid-range Android over 4G | This is the most realistic performance test before you publish any tour. |
| Simple Virtual Tour | Supports cloud and self-hosted deployment, PWA delivery, and AI editing for 1,400+ active business users. |
Why mobile-first is the only strategy worth building around
Teams consistently spend their energy on image resolution and hotspot design, then publish the tour on a hosting platform that delivers a six-second load on a mid-range phone. That is where most tours fail, not in the capture.
The Simple Virtual Tour development team frames this plainly: a tour is a mobile product first. Desktop performance is a bonus. When you treat hosting speed and touch navigation as the primary deliverables, the rest of the workflow falls into place. The mobile-first performance evidence is clear: layout, load speed, and touch navigation directly correlate with engagement and reduced abandonment.
The 1,400+ users on Simple Virtual Tour are not all photographers. Many are real estate agents and hotel managers who needed a repeatable, fast workflow. What they share is a decision to treat the phone in the visitor's hand as the primary screen, not an afterthought.
The most common mistake I see is optimizing the wrong variable. A 12,000 x 6,000 pixel panorama looks stunning in a desktop browser and kills conversion on every other device. Compress first, then add resolution only where the hosting infrastructure can serve it quickly. That sequence, not the capture hardware, is what separates tours that convert from tours that impress the person who made them.
Simple Virtual Tour: mobile-first hosting built for this workflow
If you want a hosting platform that matches the iPhone-first workflow above, Simple Virtual Tour gives you both cloud-hosted and self-hosted deployment, so you control where your data lives and what the tour costs long-term. The platform's mobile-optimized viewer, PWA support, and built-in AI editing tools mean you can go from uploaded equirectangular to published, branded tour without touching desktop software.
For real estate agents, the Google Street View export and white-label embeds make it straightforward to deliver client-ready tours the same day you shoot. For hospitality and event teams, the e-commerce and booking integrations sit directly inside the viewer, so visitors book without leaving the tour. The Capterra-listed feature set covers unlimited tours, live session hosting, multilingual UI, and API access.
Many active users already rely on it for exactly this workflow. Start your free trial or purchase directly to publish your first mobile-optimized tour today.
Useful sources and further reading
- Mobile-Optimized Tours and Customer Experience in 2026
- I shot a 3D tour on my iPhone and had it live in 45 minutes — here's the exact workflow
- Make a Virtual Tour with iPhone: Step-by-Step [2026] | Travvir
- How to Create a Virtual Tour for Free (Phone Only) | Travvir
- Simple Virtual Tour reviews. Is Simple Virtual Tour good? - SaaSHub
- Simple Virtual Tour Cost & Reviews - Capterra Australia 2026
- Fstoppers